
Upload a document to a Document Library and pass properties with PowerApps
Due to the fact, that it is currently not possible to simply integrate an upload functionality for a document library, I searched for alternate solutions.
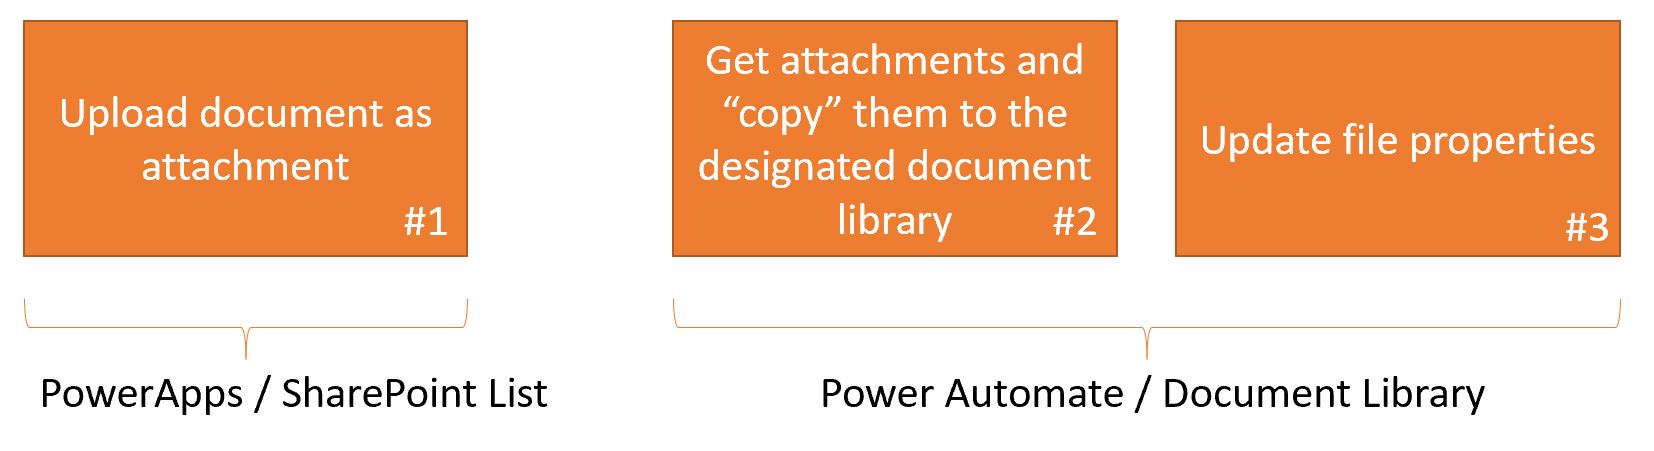
In detail, an upload and passing Metadata to a SharePoint document library is divided in two steps. First you must upload a document to the library. Afterwards you can update the metadata information. That would require that a PowerApp must wait for something like a callback with a 200 message or at least an “upload successfull” information.
Some of you may notice that a standard SharePoint List comes with a column “Attachments”. This will allow us to trigger an upload action. The plan is to use a list to upload a document, pass the information in the fields and copy the document to the library with Power Automate. The following components are necessary:
- SharePoint List with a custom column “Property1” (Single Line of Text)
- SharePoint Document Library with a custom column “Property1” (Single Line of Text)
- A Flow in Power Automate
- A PowerApp
The Flow
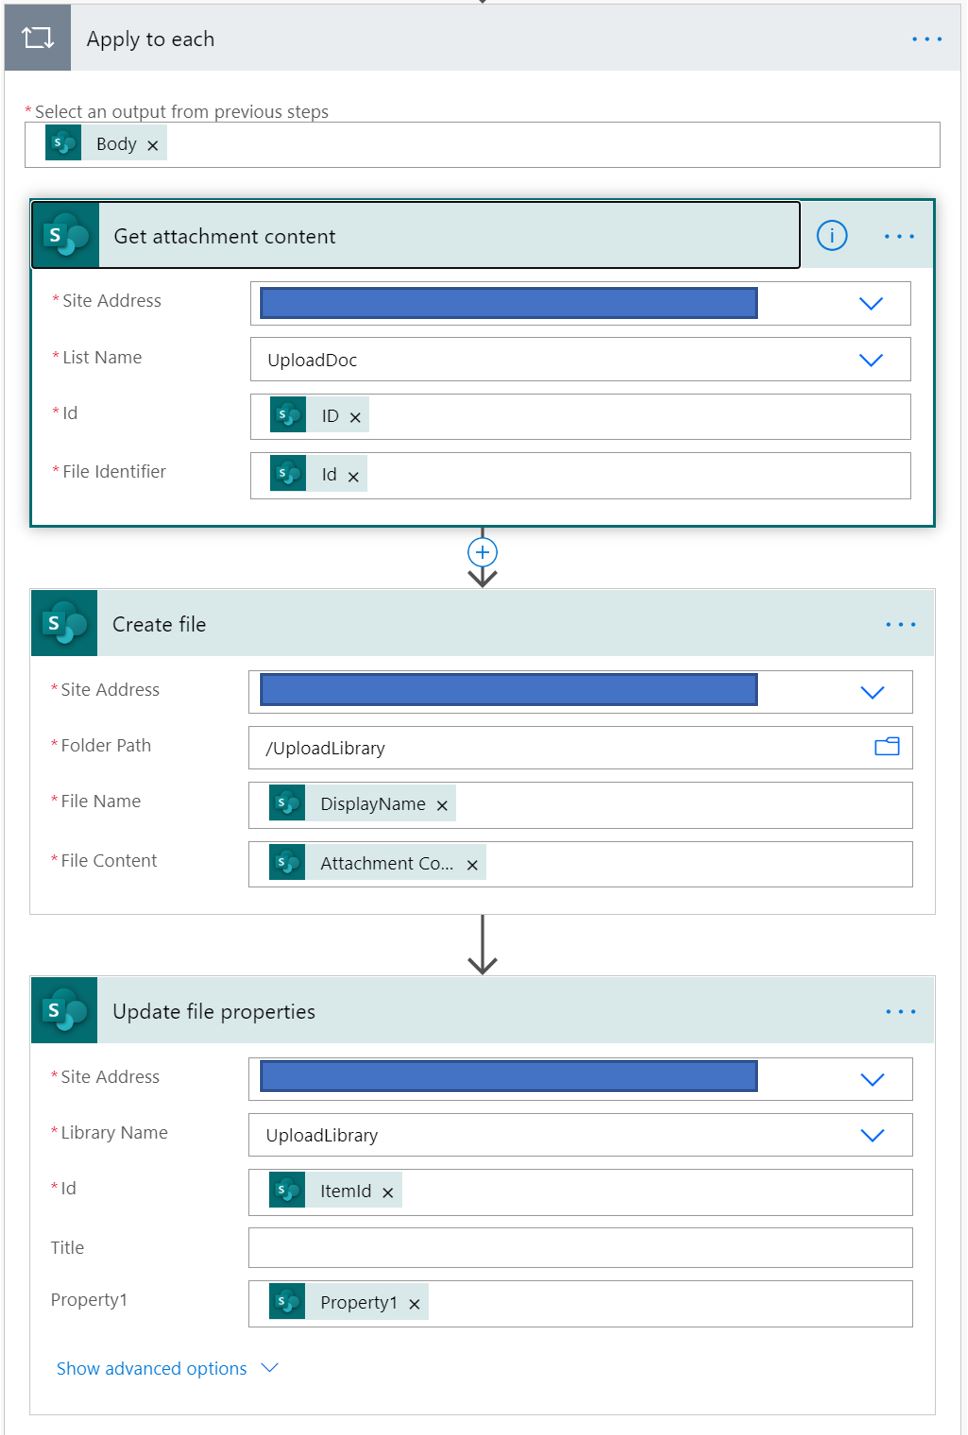
First, we need a trigger. In our case we will use “When item is created” from a SharePoint List.
Second step is to get all attachments. Why multiple!? Because it is possible to upload multiple documents with the functionality and we have to catch that case.

Afterwards we must loop through each attachment object. The first action in the loop is “Get Attachment content”, with that data we can create a file as a next step. The last step would be to update the file properties. In our case it is a simple Single Line of Text field, but for sure it can be any type of column.
It is a simple and straight forward Flow:
PowerApp
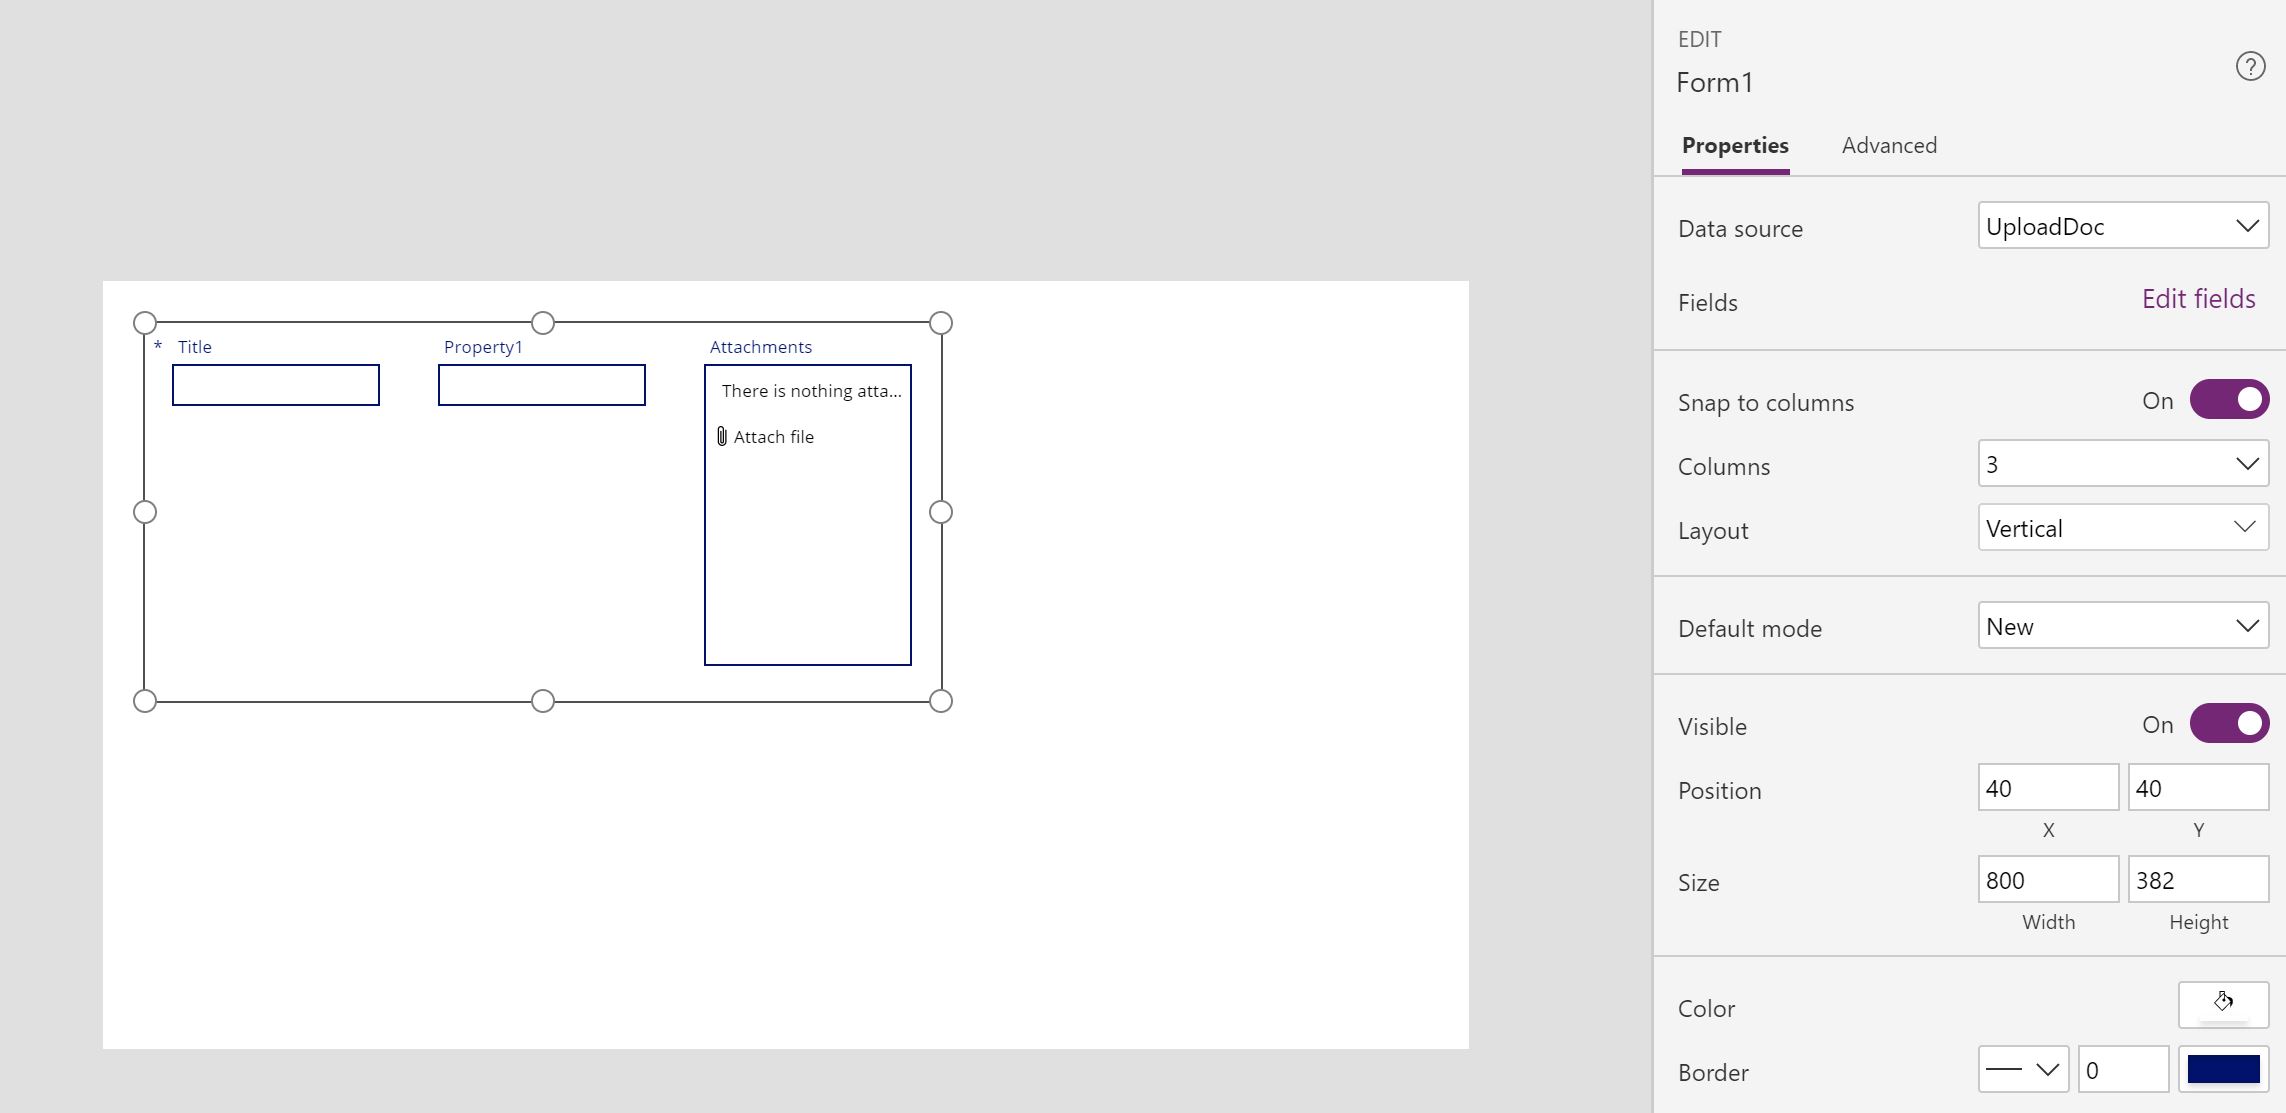
The last step in our use case would be to integrate the functionality into a Canvas PowerApp. For that, we have to insert a form for the created SharePoint List.
- Insert a Datasource – SharePoint
- Select the corresponding SharePoint site
- Select the created custom list
- Insert an Edit Form via the Insert tab – Forms
- Select the list as a DataSource on the property pane on the right side
- Change the default Mode to New in the property pane
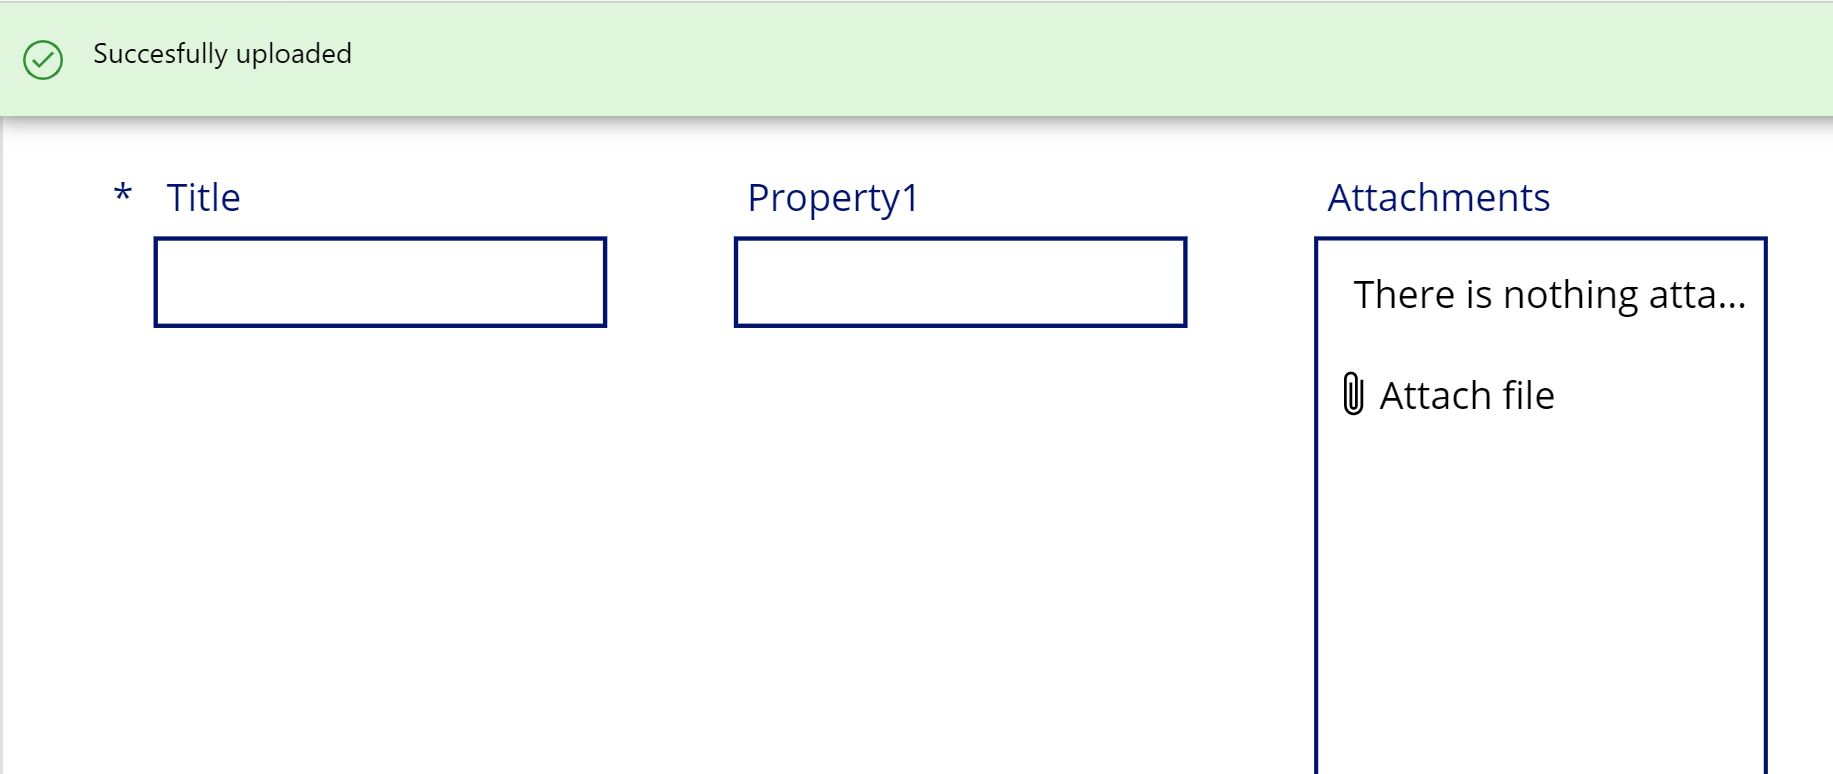
- Add a button and insert the function for the property “onSelect” – SubmitForm(Form1);NewForm(Form1);
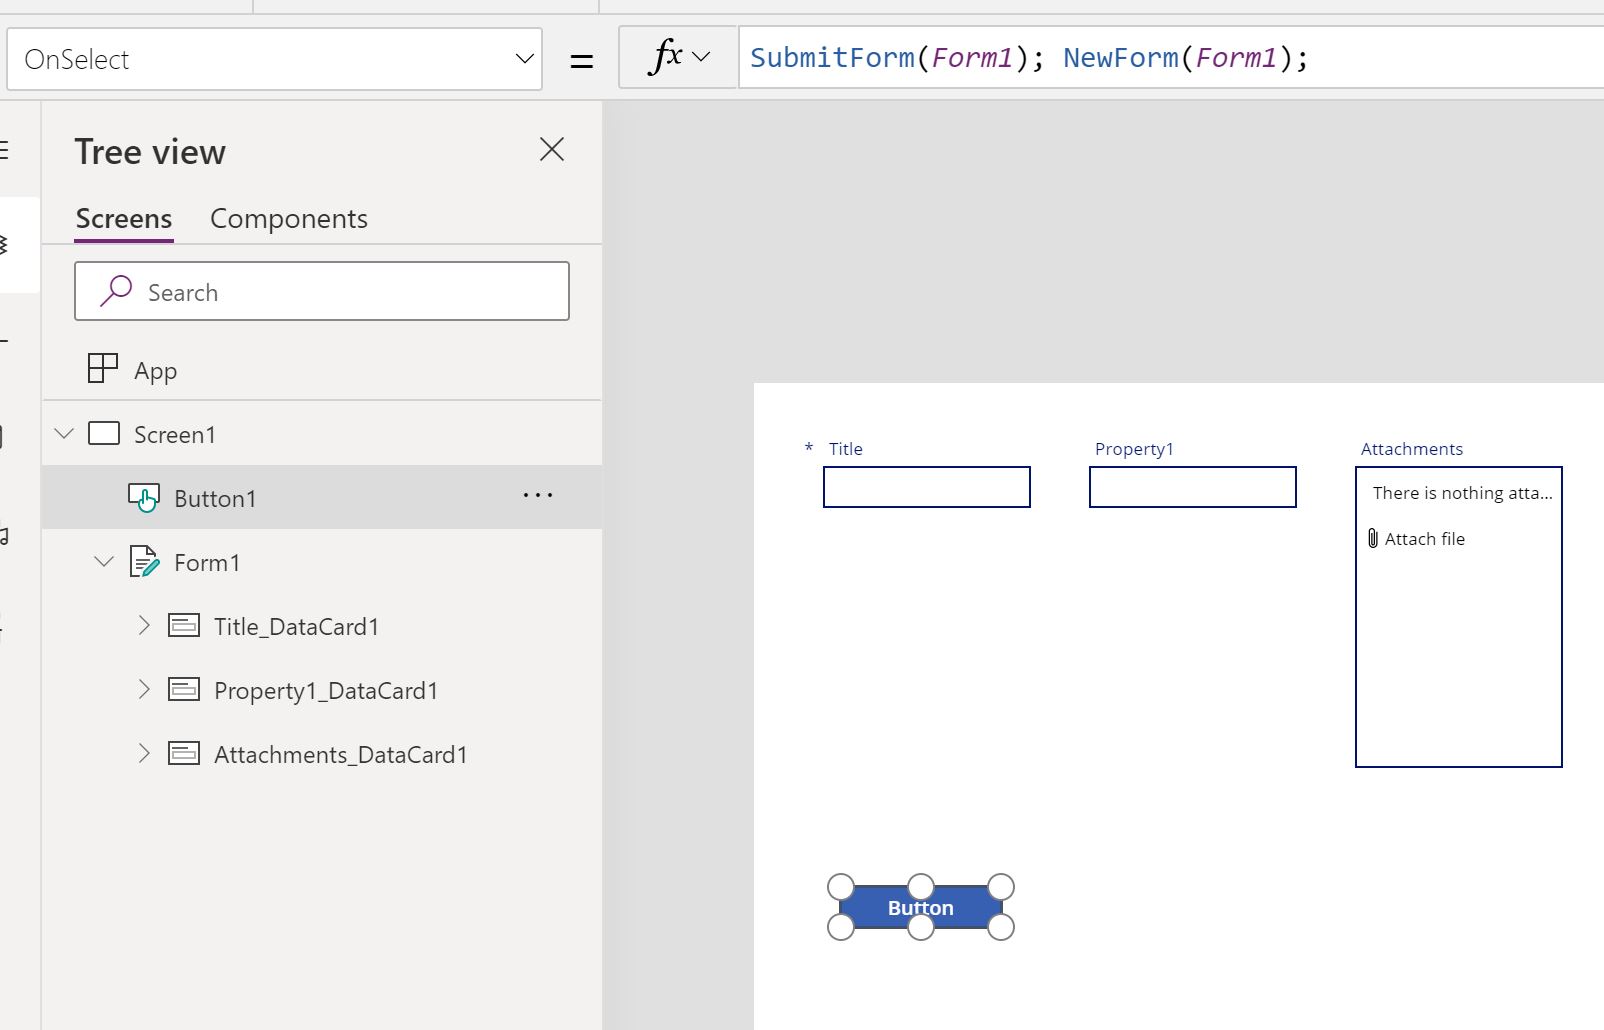
- To get a feedback we change in the form the property “OnSuccess” – Notify(“Successfully uploaded”, NotificationType.Success)

- Test it 🙂

The final result can be seen in the document library.
